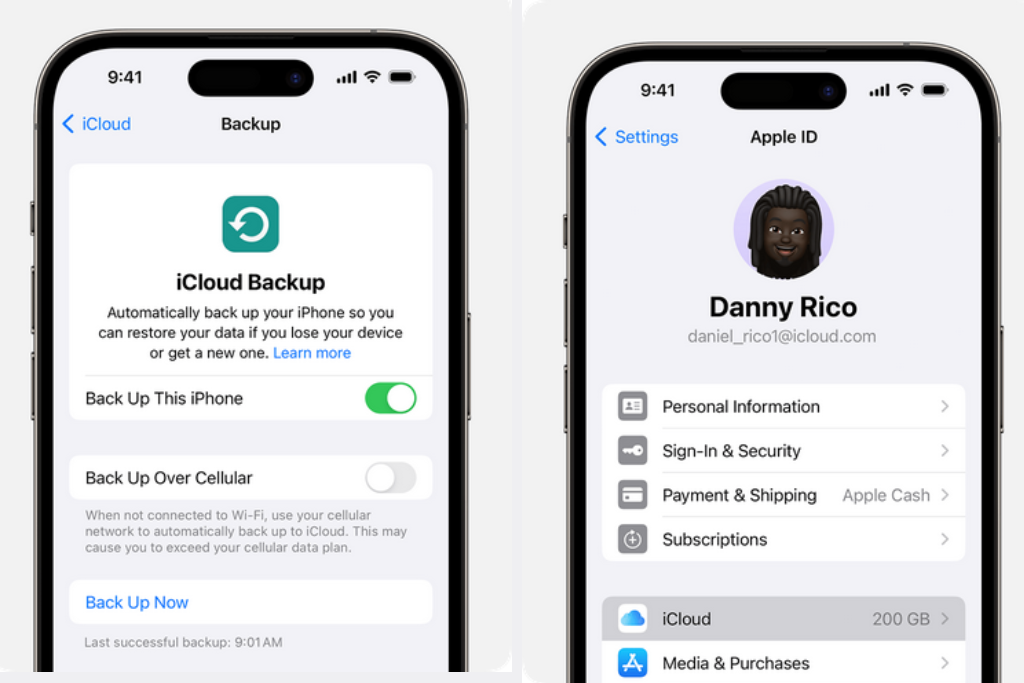
Backing up your iPhone is essential to ensure your data is safe in case of device loss, damage, or upgrade. There are three main ways to back up your iPhone: via iCloud, on a Mac, or on a PC. This guide will help you understand the differences and guide you through each method.
1. Backing Up via iCloud
iCloud backup is a convenient and wireless method of storing your iPhone data in the cloud. Here are the key details:
- Storage: Apple provides 5GB of free iCloud storage, but additional space requires a subscription.
- Location: Your backup is stored online in iCloud, accessible from any Apple device signed into your Apple ID.
- Access: You can initiate a backup from anywhere with a Wi-Fi connection.
- Data Included: Almost all of your iPhone data, settings, and home screen layout are backed up.
- Sync Across Devices: Your data syncs across all Apple devices using the same Apple ID.
- Encryption: iCloud backups are automatically encrypted, ensuring data security.
- Backup Method: Backups can be done automatically or manually through iPhone settings.
- Setup: Requires Wi-Fi and your Apple ID.
- Steps to Backup: Go to Settings > [Your Name] > iCloud > iCloud Backup on your iPhone and select Back Up Now.
- Backup Progress: Progress is managed directly from your iPhone settings.
- Common Issues: There are no major common issues reported with iCloud backups.
2. Backing Up on a Mac
If you prefer to store your backup locally on your Mac, here’s what you need to know:
- Storage: No additional cost is required; it depends on the available space on your Mac.
- Location: Your backup is stored locally on your Mac, making it accessible without an internet connection.
- Access: Requires a physical connection between your iPhone and Mac using a USB cable.
- Data Included: Almost all of your iPhone data and settings are included in the backup.
- Sync Across Devices: Backups are stored only on your Mac and do not sync across devices.
- Encryption: Encryption is optional and must be enabled manually.
- Backup Method: Backups are done manually via Finder (available on macOS Catalina or later).
- Setup: Requires macOS Catalina or later.
- Steps to Backup: Connect your iPhone to your Mac using a USB cable, open Finder, select your iPhone, and choose Back Up Now.
- Backup Progress: You can monitor the progress via the Finder status bar.
- Common Issues: Ensure that your macOS is updated and you are using the correct USB cable.
3. Backing Up on a PC
Backing up to a PC involves using iTunes, which stores your data locally. Here are the details:
- Storage: There’s no additional cost, and it depends on the available space on your PC.
- Location: Your backup is stored locally on your PC, making it accessible without an internet connection.
- Access: Like on a Mac, this method requires a physical connection between your iPhone and PC.
- Data Included: Almost all of your iPhone data and settings are included in the backup.
- Sync Across Devices: Backups are stored only on your PC and do not sync across devices.
- Encryption: Encryption is optional and must be enabled manually.
- Backup Method: Backups are done manually via iTunes.
- Setup: Requires iTunes installation on your PC.
- Steps to Backup: Connect your iPhone to your PC using a USB cable, open iTunes, select your device, and choose Back Up Now.
- Backup Progress: The progress can be monitored via the iTunes status bar.
- Common Issues: Common issues include your iPhone not showing up, outdated drivers, or using the wrong cable. Make sure iTunes is updated.
Conclusion
Whether you choose to back up your iPhone via iCloud, on a Mac, or on a PC, each method offers unique benefits. iCloud is convenient and wireless, while backing up to a Mac or PC provides local storage and greater control over your data. Ensure that you regularly back up your iPhone to protect your data and settings from unexpected events.
